D2
Администратор
- Регистрация
- 19 Фев 2025
- Сообщения
- 4,380
- Реакции
- 0
Write Your Own crypter with GUI in One tutorial, In less than One Hour. And Evad's most popular AV, EDR products!
The Killer Guide by TOP G
Source https://xss.is
The final result of the crypter we will develop in this tutorial :
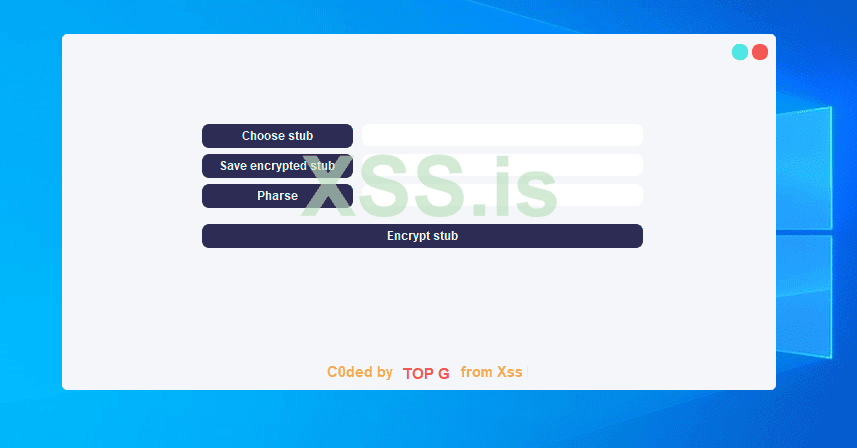
Hi, today I will teach you how to develop your own advanced crypter Fud Runtime + Scantime, After this tutorial I guarantee to you , you will bypass Most used AV ( antiviruses ) Such as Windows Defender, Kaspersky, Avira, Avast, Bitdefender, AVG, and more.
I will leave ( Proof of concept ) Videos for you to see the bypass, I created videos Bypassing on the Top asked to bypass Av like Windows Defender and Kaspersky.
This is an advanced tutorial that will help beginners and advanced Users, So stay with me and make sure your coffee cup is ready before you start reading.
This Guide will be splited into Three stages,
Stage 1: The GUI which will be the builder including the Login window which will handle the serial key between the server and GUI and if login success will close itself and Show the MainWindow, and the MainWindowwhich will be used to handle the shellcode
between the server and the Gui.
Attention: We will use the Server side for Authentication, Let us assume we have 100 Paid users, every user should have a different SerialKey, which will store the SerialKey in the database on the Server side, Also We will use the Server side to encrypt the Cobalt strike beacon for a reason.
Why use Server-side for Encryption?
We wan’t store the encrypted shellcode for example: in the pe section or Resource cause these two ways are most of the time detected
One more reason is To make our Final stub More FUD and undetectable By building it at Runtime I will discuss everything later.
Stage 2: HTTP Server with php installed On Windows System, I suggest you use Windows Server 2019 with Microsoft Defender Disabled.
The Web server using php will handle the logging data that came from the Gui and return the Status.
Also as I said before will handle the uploaded UnEncrypted cobalt strike beacon then encrypt it using MSBuild ( MSBuild will build our c++ project ) and return the Download Link to the Gui Which will download the Encrypted stub to the Path selected by the User
Stage 3: The last stage is the Encrypted stub which will store the encrypted beacon on it as an unsigned char than in the main() function.
We will use some techniques to hide the IAT import address table Also this section will be discussed in its stage.
Here is what iam using tools and languages to develop the Crypter
I will use CobaltStrike version 4.8 as a C2 you can use any other framework like Metasploit
#What Skills do you need to continue reading and learning from this tutorial?
1 - Just c/c++ Language (Visual studio c++)
2 - Gui (Qt C++) If you don’t have any idea or skills to use Qt don’t worry I explained everything in the tutorial
3 - php but if you are familiar with Python or NodeJs you could also use them if you want
Download Wampserver and install it on your Windows server
Let's start with the GUI
Please first Download Qt6 c++ version 6.5.2 that’s the version iam using Right now.
If you already have Qt installed then launch it up and create a new project and make sure the selected compiler is x64
This is the main window it should look like this.
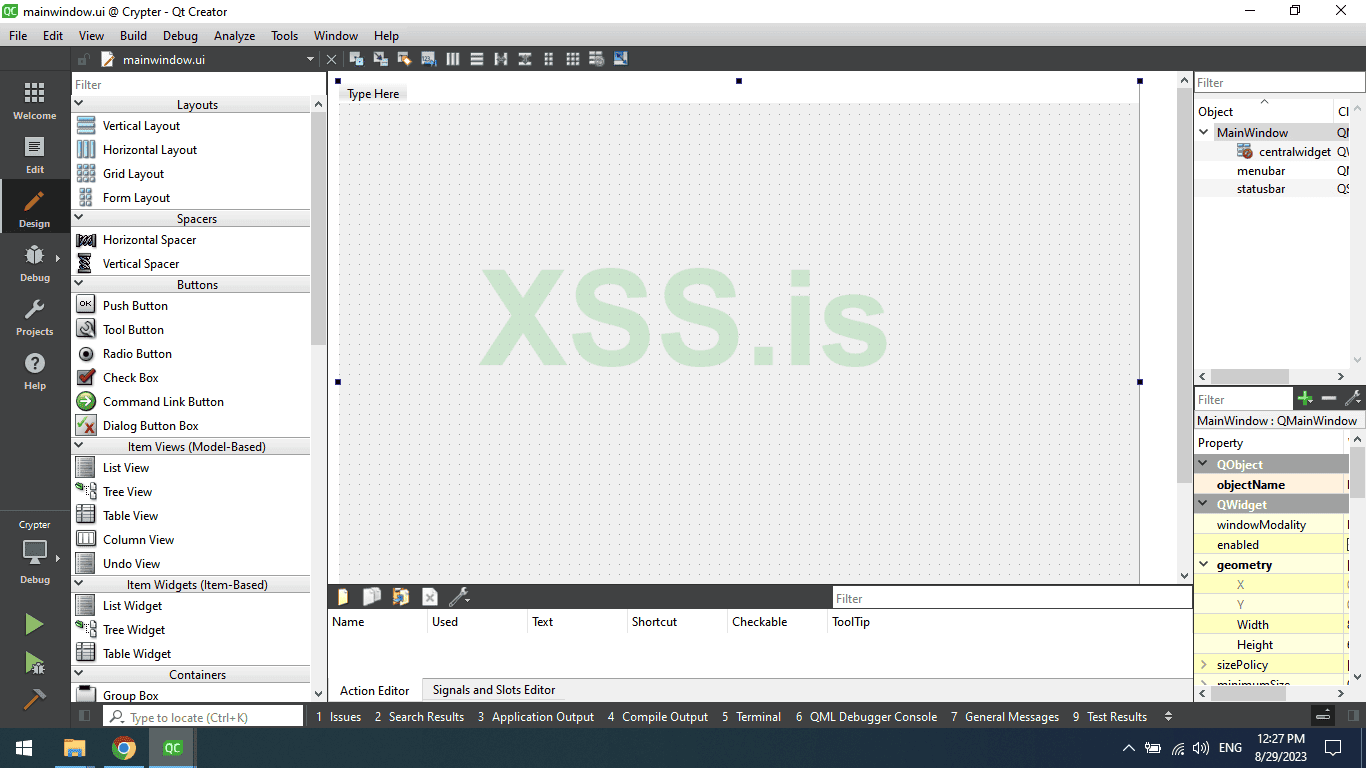
The project came with a default Mainwindow.ui, We need to add a new Qt class from design to generate a new window for login.
Scenario: I guess you already know that Paid software always comes with a serial key Window before you can use the software, so when you enter the license Key then you can use the software. It's like a protection to Force people to pay for the developer before they can use their software.
The Project by Default If we build it and run it will show up in the Mainwindow by default, but we want to work on the Loginform window so to show the LoginForm window go to main.cpp and comment w.show() and add the following code
C++: Скопировать в буфер обмена
The code above will create an object from the Loginform class and then use the function show() to show the Window of the Loginform.
Now on The left Under Welcome Click Edit then right-click on The Main project, and now click on Add New, After that, it will show a new window to choose a type of file to add to the project, Double Click on Qt Designer From Class then Double Click on MainWindow But warning as you remember the project came with default window name Mainwindow so make sure to change the new one , I prefer to name it as his job the Job of the new Window to make sure the user has a Serial Key and He Paid to use the Software.
So I named it LoginForm.
Now delete, Menubar and Statusbar and should look like this, The reason we want to delete the menubar and status bar because we want to make our custom title bar
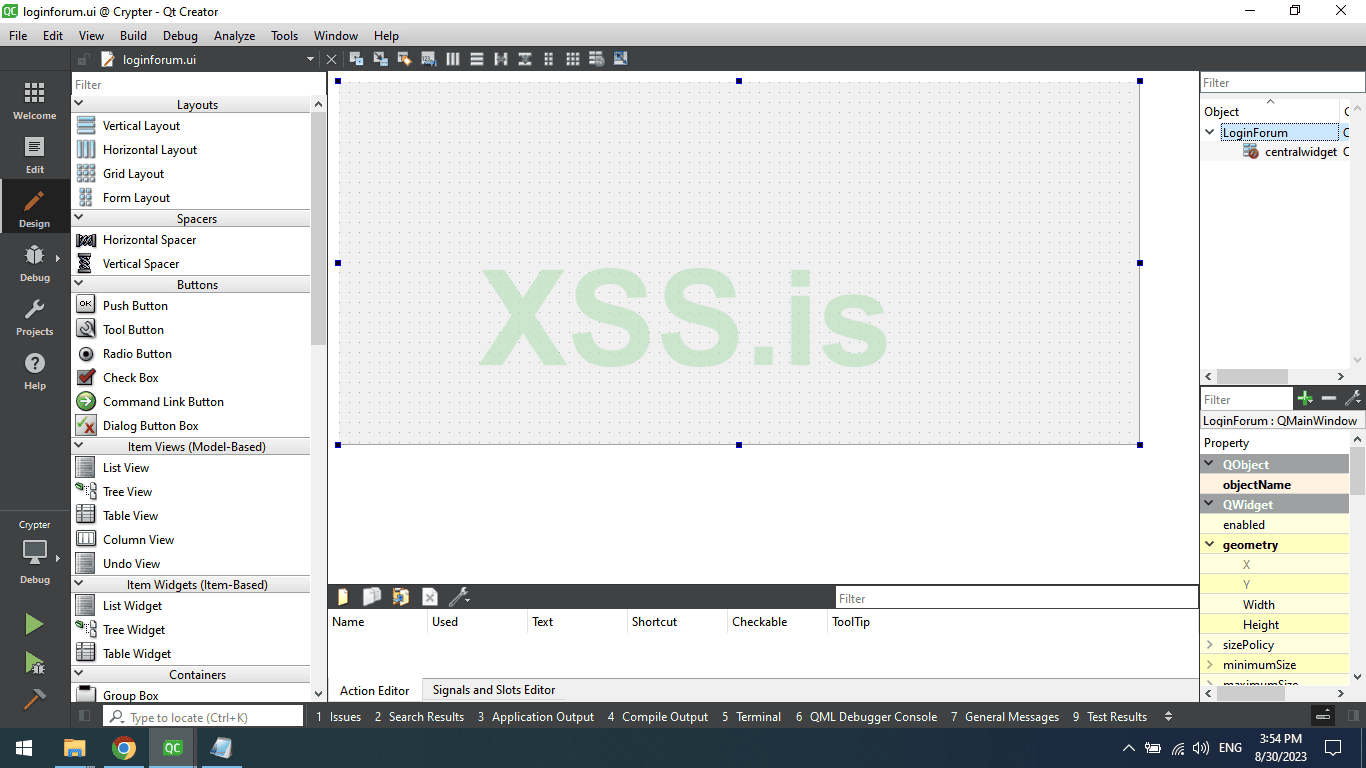
Now in LoginForm Go to property and search for geometry and click on Change the Width and height to the Following Sizes.
Width: 400
Height: 266
Now in the left corner search for Qwdigets and drop 4 widgets.
The first Widget is for the Mainwindow and the second Widget is for the LoginBox which will hold input and QEditLabel and QPushButton, The third Widget will be for the Custom title bar and the Fourth and last one is for the Footer which will hold the name of the Developer.
Change the sizes And X, Y of the MainWidget and make the sizes as the MainWindow of LoginForm.
Width: 400
Height: 266
X: 0
Y: 0
This is what it looks like
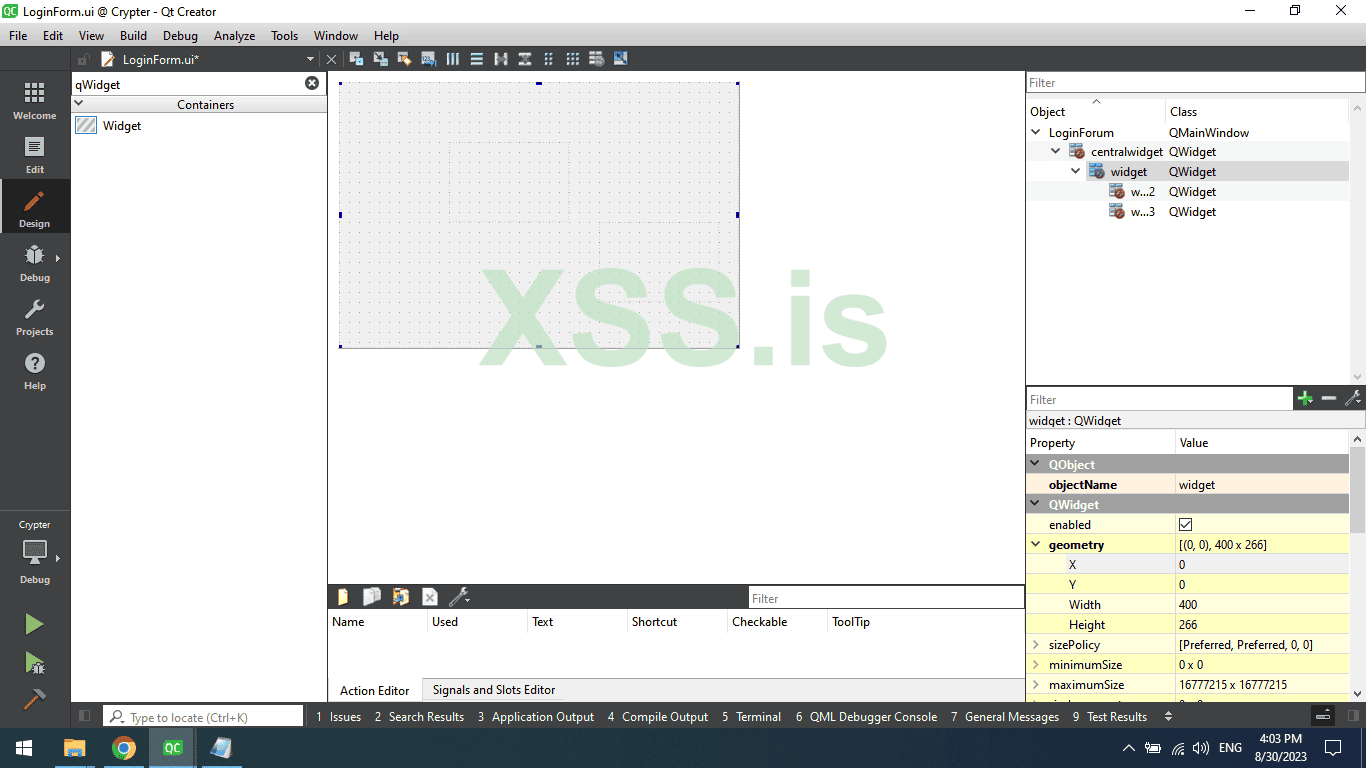
Now the Second LoginBox qWidget Change the sizes and X, and Y to the following data.
Width: 351
Height: 121
X: 25
Y: 60
Title Bar qWidget geometry data.
Width: 400
Height: 21
X: 0
Y: 0
Footer qWidget geometry data.
Width: 400
Height: 31
X: 0
Y: 232
Now search for QPushButtons and drop 1 QPushButton to TitleBar and 2 QPushButton to LoginBox, also Search for QLineEdit and drop one to LoginBox qWidget.
Change the text of QPushButtons on LoginBox and make one License Key and the other one Login
Also, change their names from Property in the right corner
Name the Login button as login_button and name the License Key button as
LicenseKeyLabel and name the QLineEdit as LicenseKey
Now time to change the sizes and geometry.
login_button
Width: 261
Height: 24
X: 40
Y: 70
LicenseKeyLabel :
Width: 101
Height: 24
X: 40
Y: 30
LicenseKey
Width: 151
Height: 24
X: 150
Y: 30
Result :
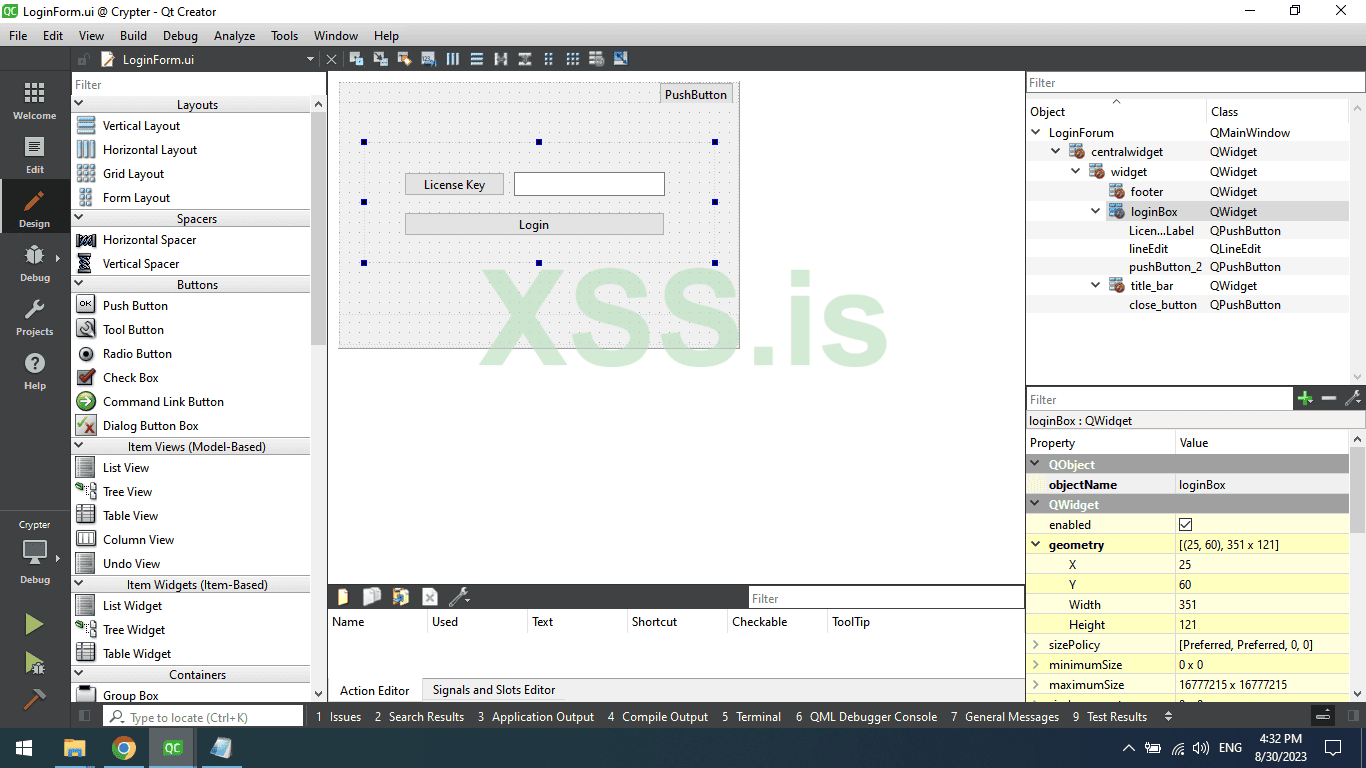
Now Click on QPushButton on the title bar and remove the text and name it as close_button
Let us now change the style of the Login Form, first of all, go to loginform.cpp
In QMainWindow add the following code
C++: Скопировать в буфер обмена
The code we wrote above will change the background to transparent and make the no frame or frameless for the window.
So when we add color and border radius to the main qWidget it applied and enabled other than we can’t see the border-radius also the default title bar will be visible.
Now go back to designer and right click on QMainWindow or LoginForm and Choose Change StyleSheet.
Add the following code in the Pop upped box Make Sure you named the Main qWidget to MainWidget.
CSS: Скопировать в буфер обмена
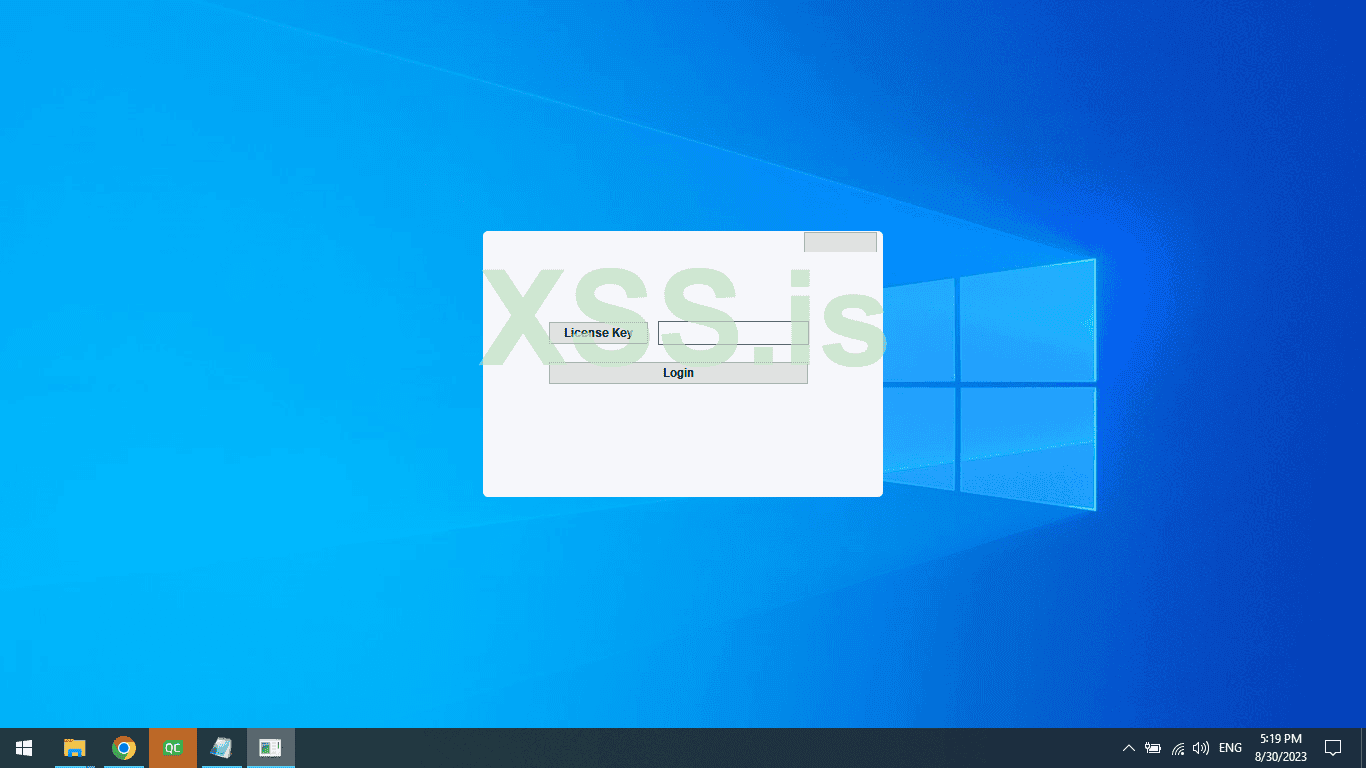
If you know CSS you will understand the code, but if you don’t the code Above we added, Simply change the Default font family, font weight, add the background color, and finally add border-radius which makes the borders and corners rounded
The result is in the image below.
Go back again to the stylesheet and again add this new code.
CSS: Скопировать в буфер обмена
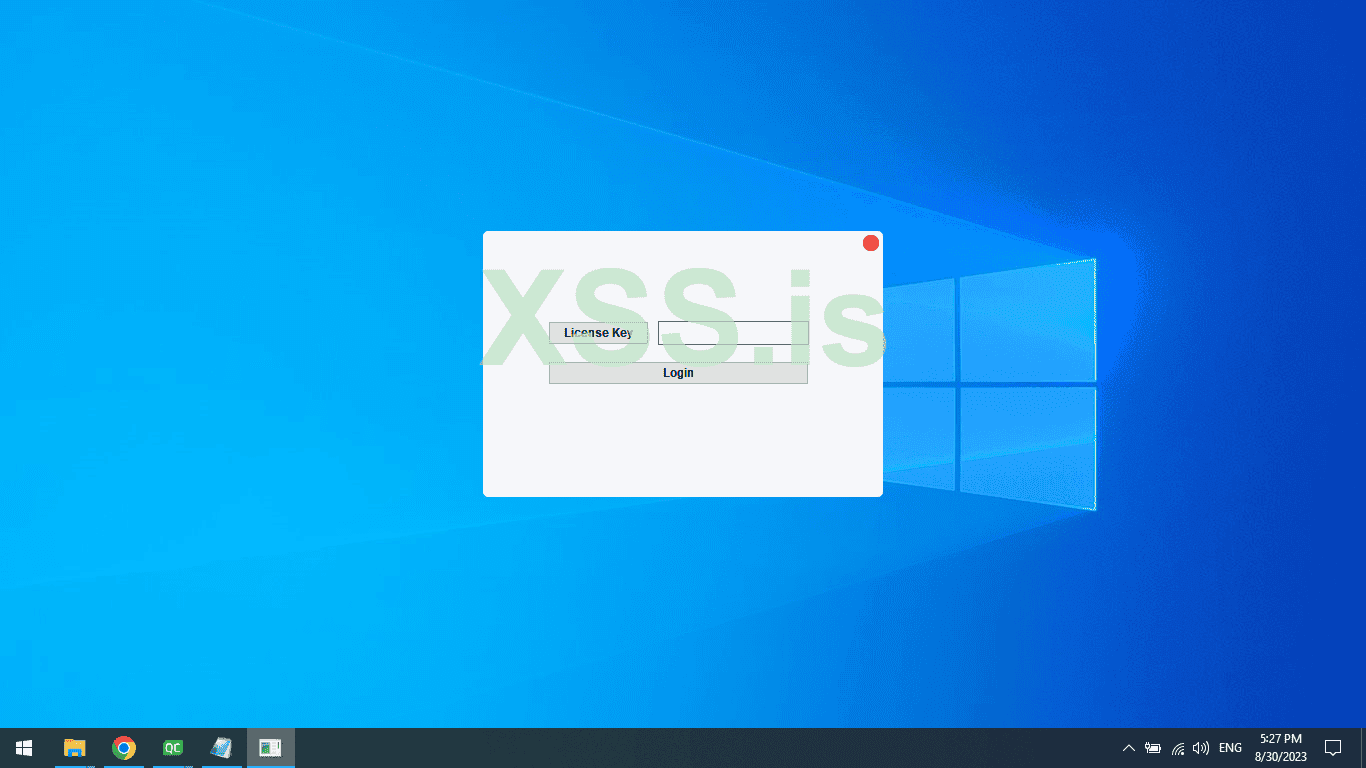
The code simply changes the radius for the close_button and adds color and on Hover changes the color.
Now Click on the close_button then in the right corner search for geometry and change the geometry data and sizes for close_button
close_button
Width: 16
Height: 16
X: 380
Y: 4
Result :
Attention: You can use your own colors.
Now it's the time to play with input colors, Get Back again to the stylesheet again add this new code
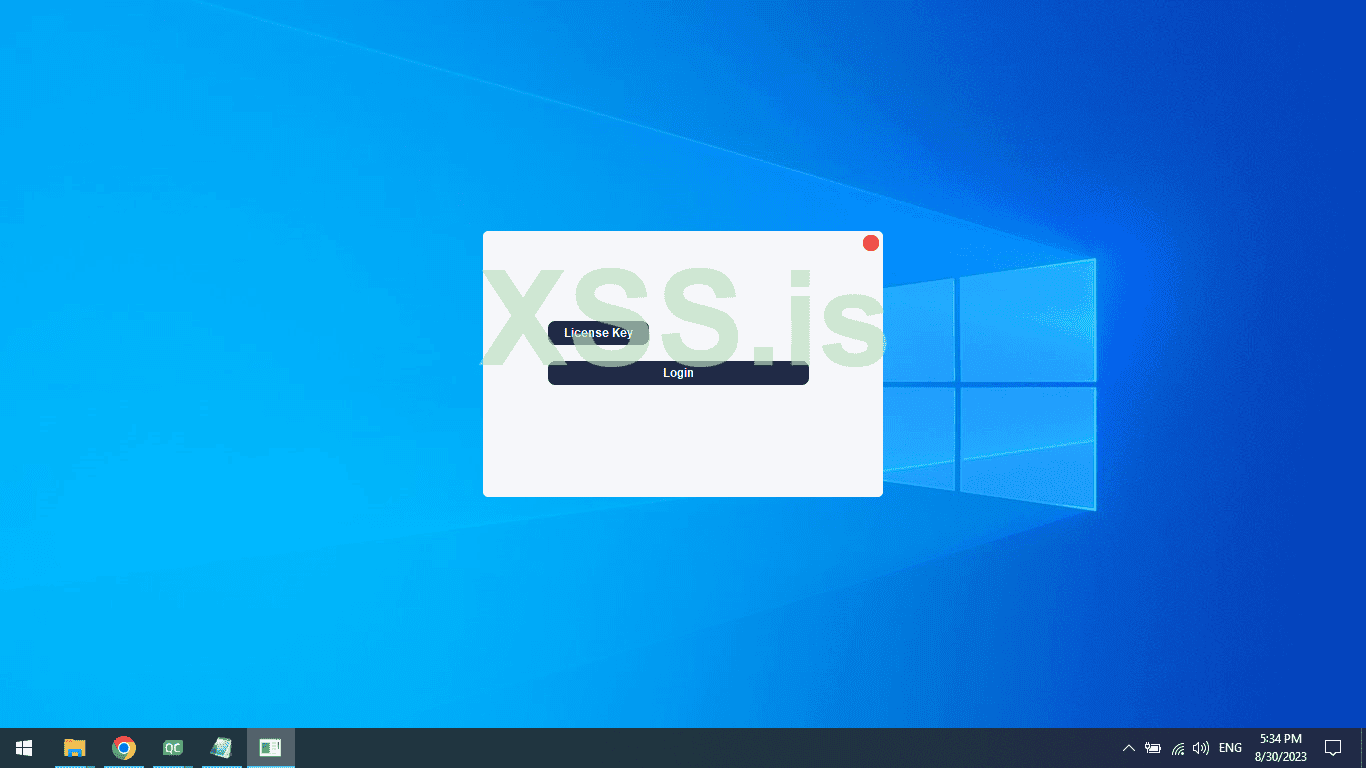
This will be the final stylesheet css code .
CSS: Скопировать в буфер обмена
Build and run the project, and the result is seen in the picture below.
Close the Crypter and get back to Designer now Righ click on the close_button Then click on Go to slots and choose Clicked slot then Press the OK button, It should take you to LoginForm.cpp
Inside void on_close_button_clicked write the following Code.
C++: Скопировать в буфер обмена
Rebuild the project and Launch it again now when the Project opens click on the close button it should close the login window.
Now the Title bar is finally finished, but we have a problem We can’t move the Window because we deleted the default title bar so To fix this problem we need to add 2 mouse events first one is
mousePressEvent and the second one is mouseMoveEvent
To do that go to loginform.h scroll down to Private: , then add the following code
C++: Скопировать в буфер обмена
When you finish go to loginform.cpp and add the following code
C++: Скопировать в буфер обмена
Now rebuild the Project and click on the loginform window and move, as You can see how you can move it on screen as you want
Let's explain the code.
mousePressEvent: This function is very simple it only gets the current position and converts it to Point
mouseMoveEvent: It gets the new position then minus it from the old current position and then uses the value to move the window
Now here is a complex step so to understand it very well please pay attention.
So as you know we have 2 windows 1 is the Login window and the second window is the crypter MainWindow.
To Show the MainWindow from Loginform we need to create a signal inside Loginform.h and also create an on_click slot on Login Finally we connect the signal and mainwindow using Connect from Main.cpp
To create the on-click event go to Designer and Right click on the login_button then click on go to slot From QAbstractButton choose clicked() then Ok
To create the Signals in the LoginForm Class add the Signal the codes for Signal are Down below.
C++: Скопировать в буфер обмена
This code for the Login Button
C++: Скопировать в буфер обмена
For now, we only make the SerialKey static but Don’t worry we will make it Dynamic Soon when we come to the Server Authentication Part so we will get back to here soon.
go to Main.cpp and the connect code
C++: Скопировать в буфер обмена
Now Compile the Project and try to add an Incorrect Serial Key and should see this error message

Now try to relaunch the program but this time add the real serial key they will show a success message Then when you click ok it will exit the login Window and show the Main Crypter Window.
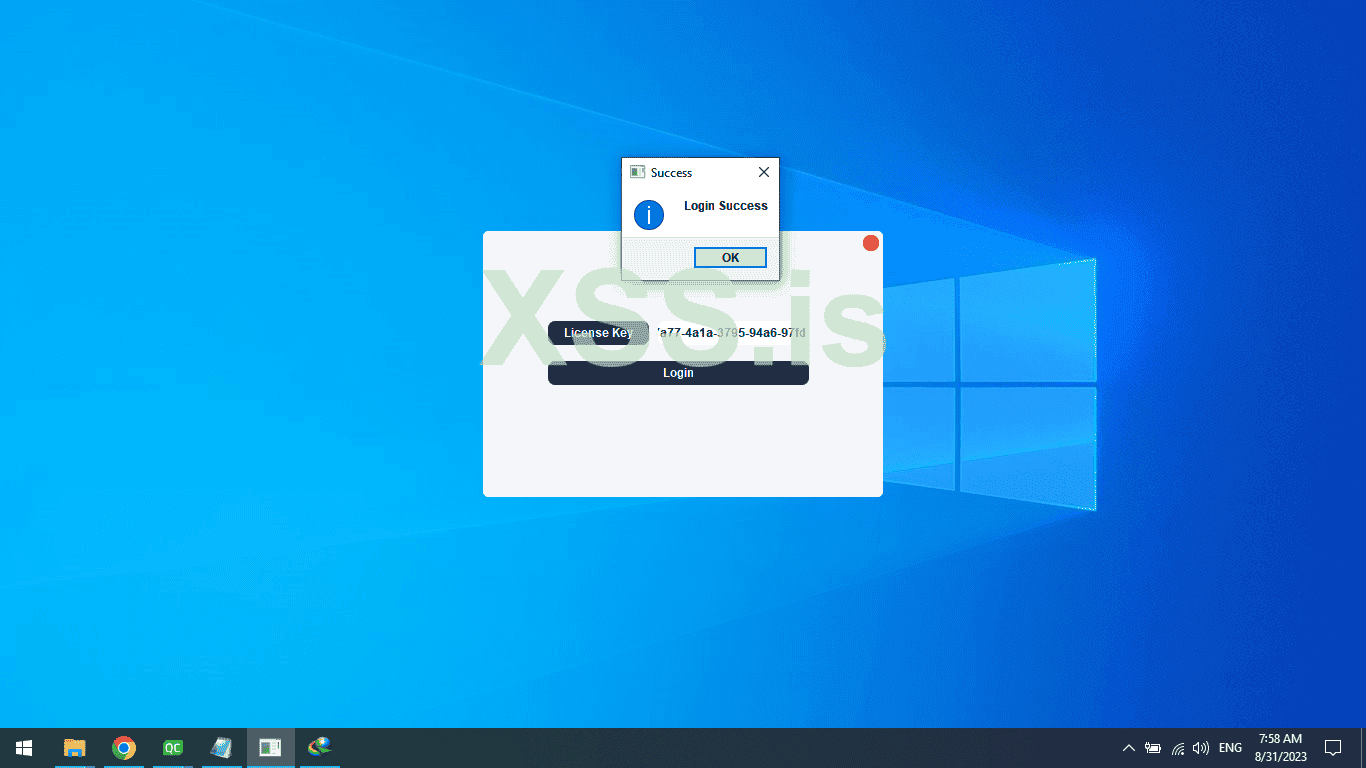
Ok woohoo, we almost finishing the Gui .!
Now it's time to start with the MainWindow, so Click on Edit Again Then Click on mainwindow.ui
Now delete the Menubar and Statusbar as we did before …. Don’t get confused this is the MainWindow, not the LoginWindow so everything we do in the login window is still saved so don’t worry about the Empty Window.
and should look like this
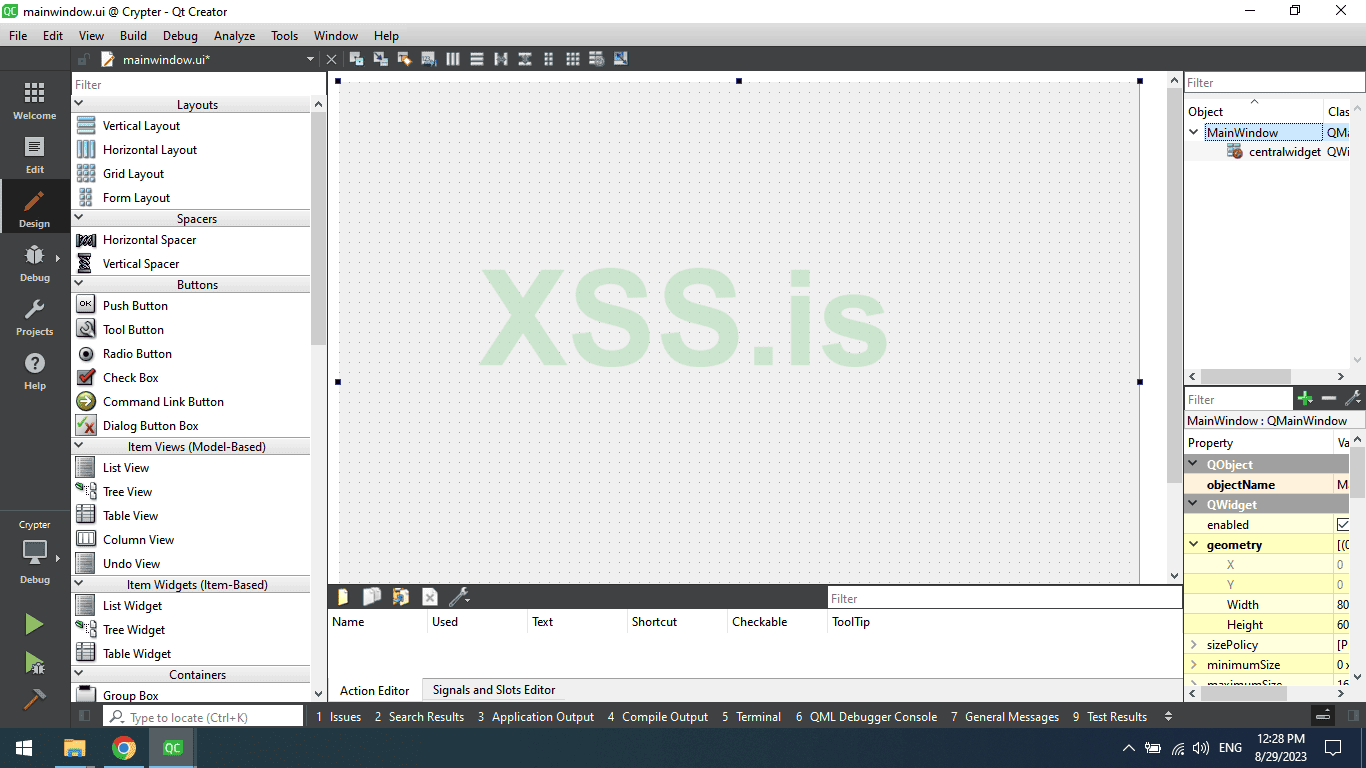
Resize the mainwindow make the width: 714 and the height: 356, then
Search for qWidget and add 4 of them, First qWidget will act as MainWindow and it will hold everything and you will see that soon, One for the Custom title bar, and One for the Inputs and buttons, and the last one for the footer.
The mainWindow should be like this.
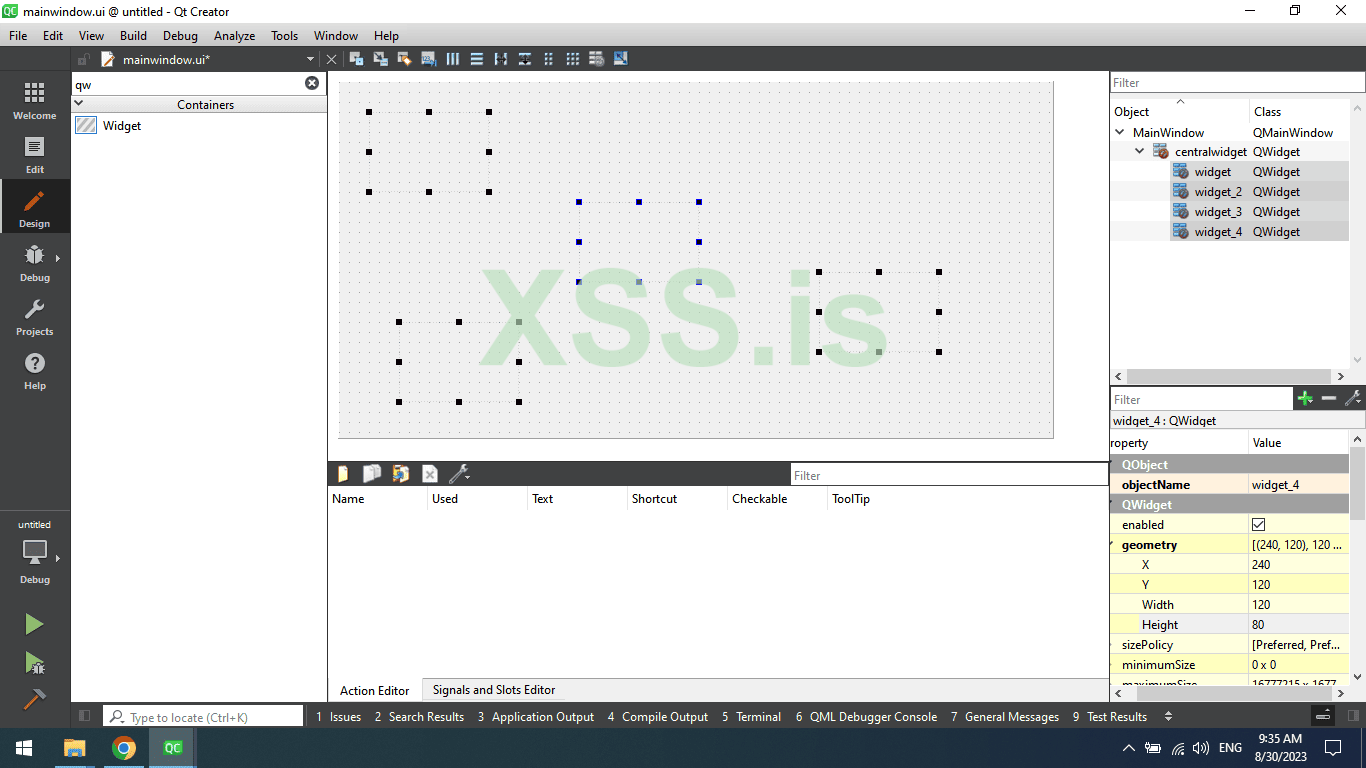
Now on the center qWidget click on it with your mouse and go to geometry in the right corner as you see in the picture above and add the width and height and the x, and y like the following.
Width: 714
Hight: 356
X : 0
Y : 0
Now on the Top left qWidget click on it with your mouse and do the same as the last step
Width: 714
Hight: 40
X : 0
Y : 0
And now it should look like this.
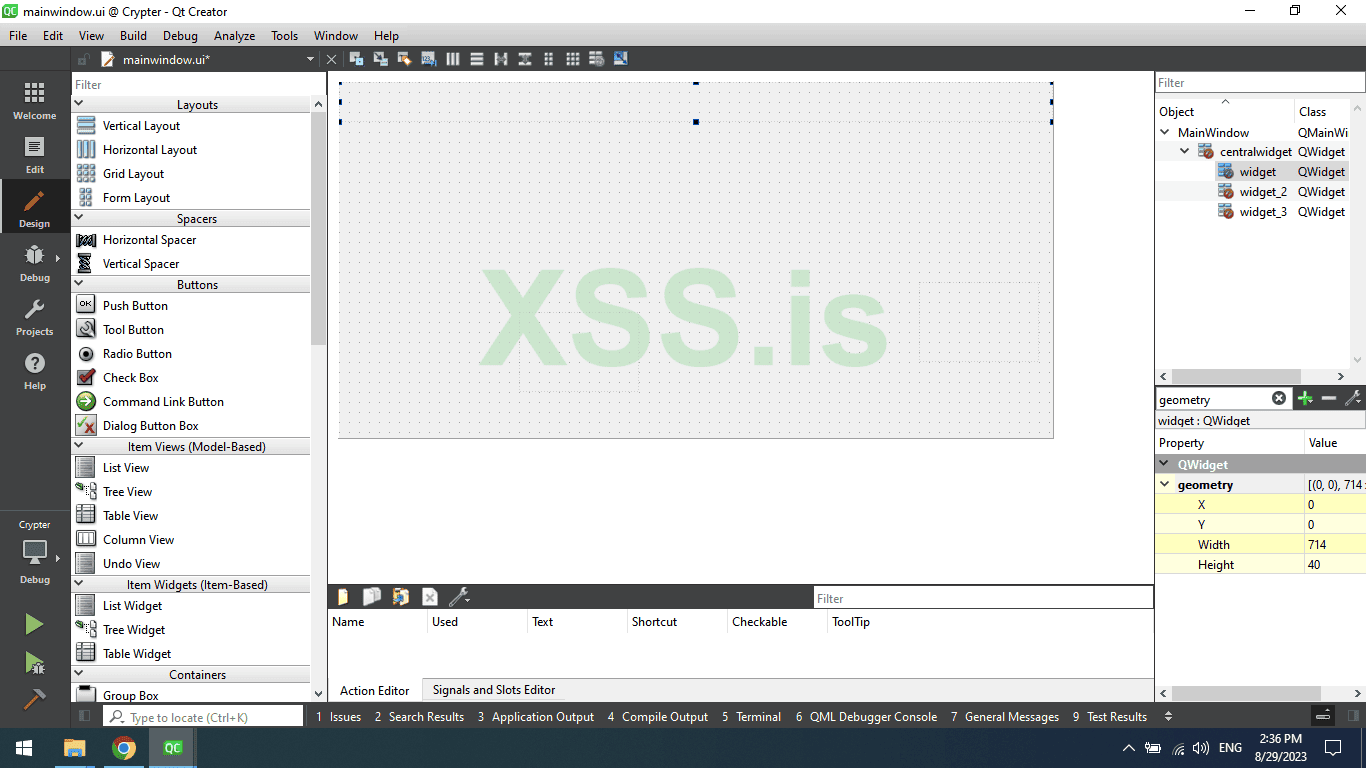
Finally, name it titlebar.
Now Click on the Bottom left of one qWidget and go to geometry again and put the following data :
Width: 714
Hight: 31
X : 0
Y: 320
Name it as a footer, should be like the image below.

Now the last Qwidget, this qWdiget will hold the inputs, labels, and buttons
Click on it and also do the same as before by filling in the geometry and name object with the below data.
objectName: Main
Width: 481
Hight: 201
X: 120
Y: 70
The result for the last steps
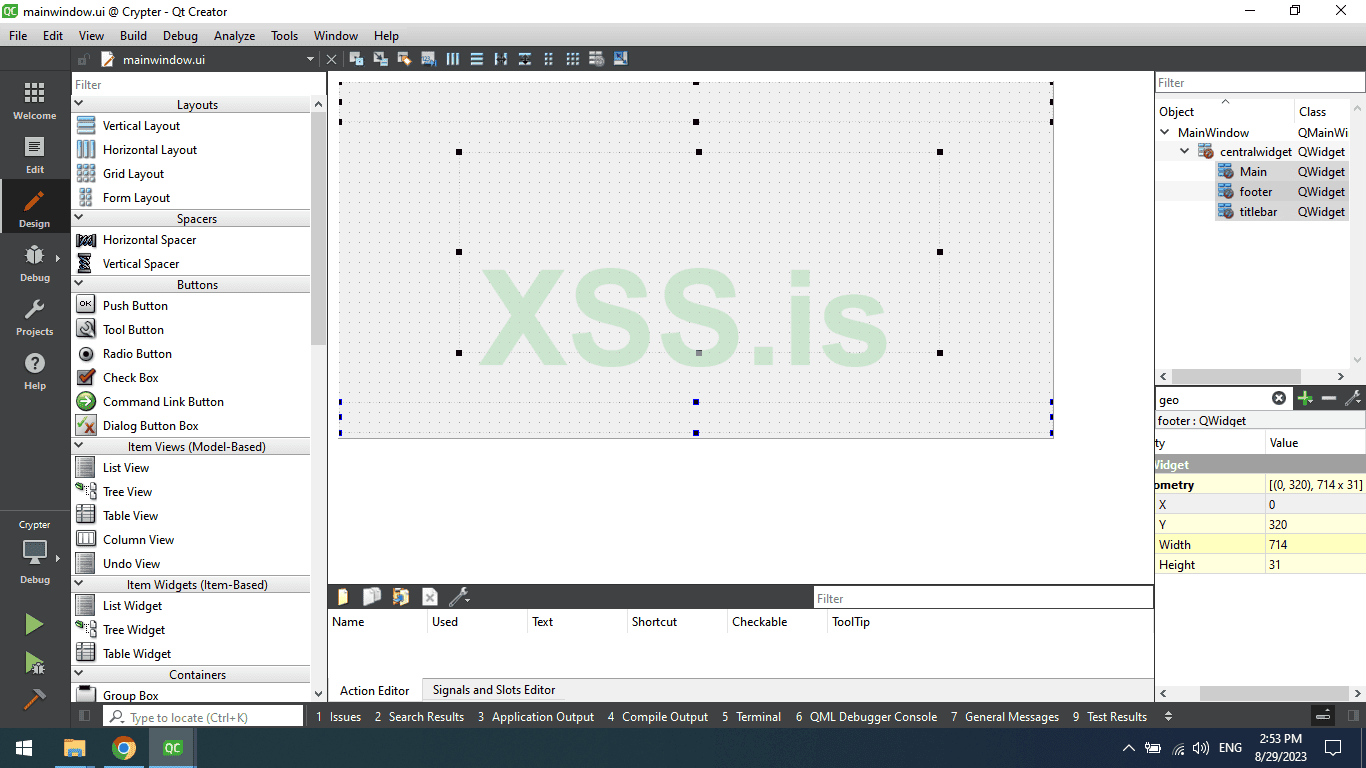
Now drop two QPushButtons to the title bar and Four QPushButtons for the Main qWidget then drop three QLineEdit also to Main qWdiget
On the title bar name the first QPushButton as close_button and the second name it as minimise_button and remove the default text.
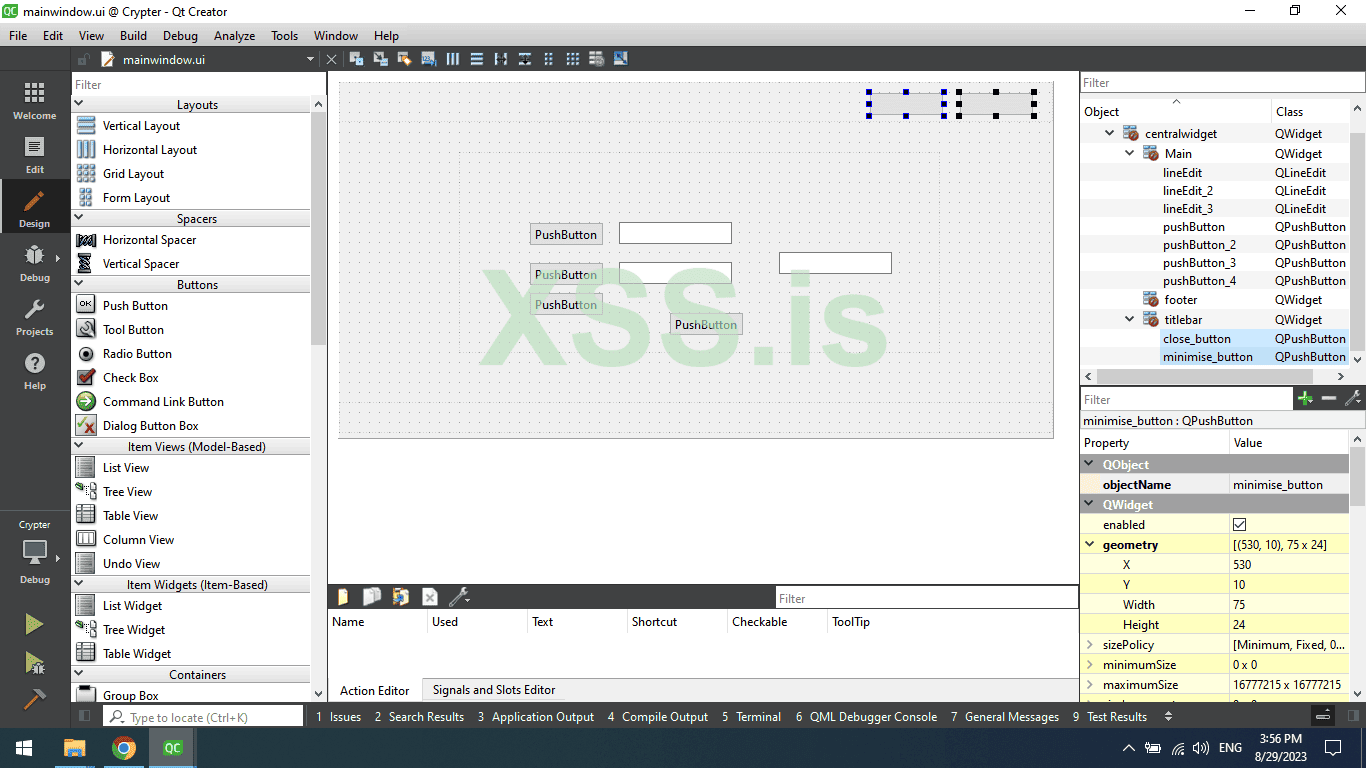
The main window should be like this.
Now go to main qWdiget and edit the three buttons and three qLineEdit, change their names and geometry data as follows
1 - Choose stub: This is a button to choose the file you want to crypt
Name: choose_stub
Geometry data :
Width: 151
Hight: 24
X: 20
Y: 20
2 - Save encrypted stub: This is a button to where to save the final encrypted stub ( The crypt ).
Name: save_encrypted_stub
Geometry data :
Width: 151
Hight: 24
X: 20
Y: 50
3 - Pharse: This is a button to acts as a Label that tells you where to write the phrase or password
Name: pharse_button
Geometry data :
Width: 151
Hight: 24
X: 20
Y: 80
4 - Encrypt stub: This is a button When you Click it will run the crypting Code
Name: encrypt_button
Geometry data :
Width: 441
Hight: 24
X: 20
Y: 120
Now the QLineEdit.
1 - Selected File Path: Here will show the path of the stub you want to encrypt
Name: selected_file_path
Geometry data :
Width: 281
Hight: 24
X: 180
Y: 20
2 - Saved file path: Here will show the path of the encrypted stub
Name: saved_file_path
Geometry data :
Width: 281
Hight: 24
X: 180
Y: 50
2 - Pharse: Here will Enter the Pharse ( password )
Name: phrase
Geometry data :
Width: 281
Hight: 24
X: 180
Y: 80
The result should now be like this
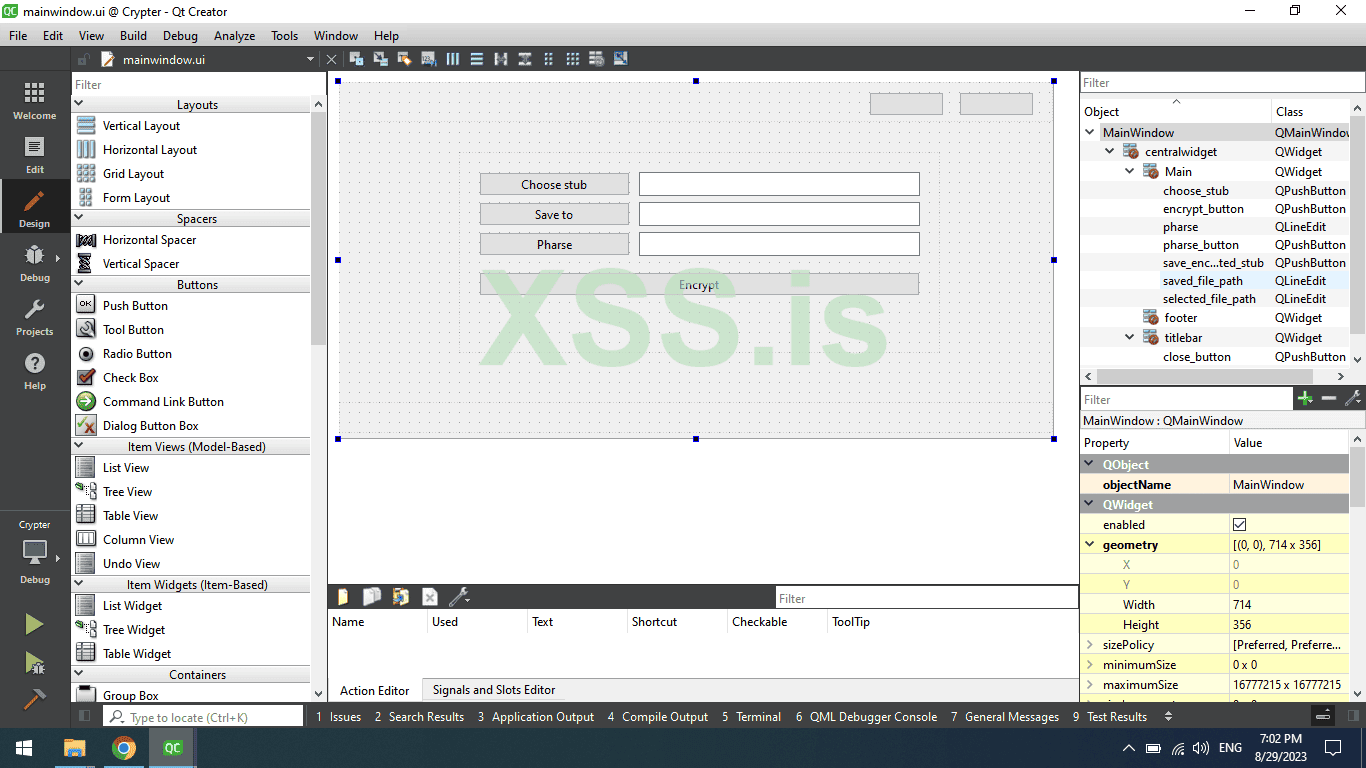
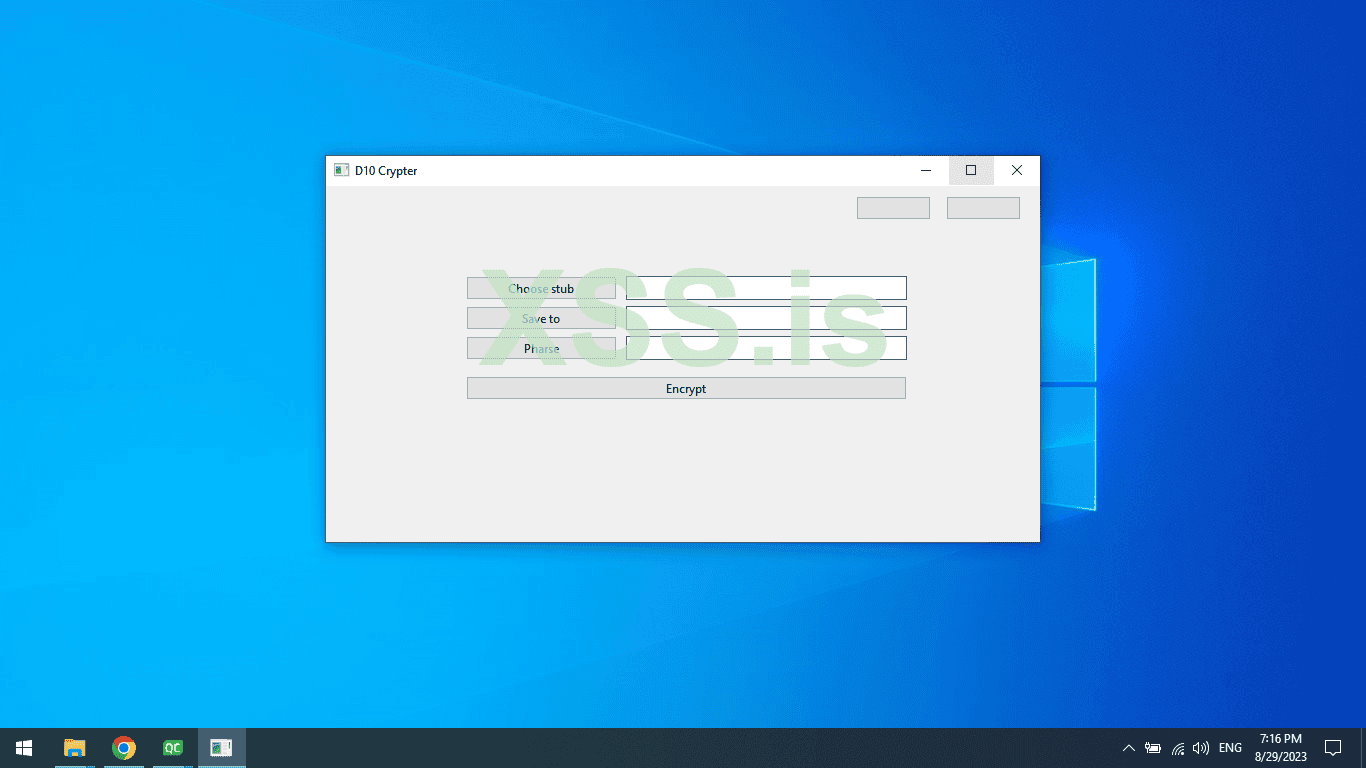
Now, we will Remove the Default title bar by adding a frameless and transparent background to the mainwindow
To do that go to mainwindow.cpp
And add the following code to the MainWindow
C++: Скопировать в буфер обмена
Compile the code Note: You can use the shortcut Ctrl + R to build and launch the exe
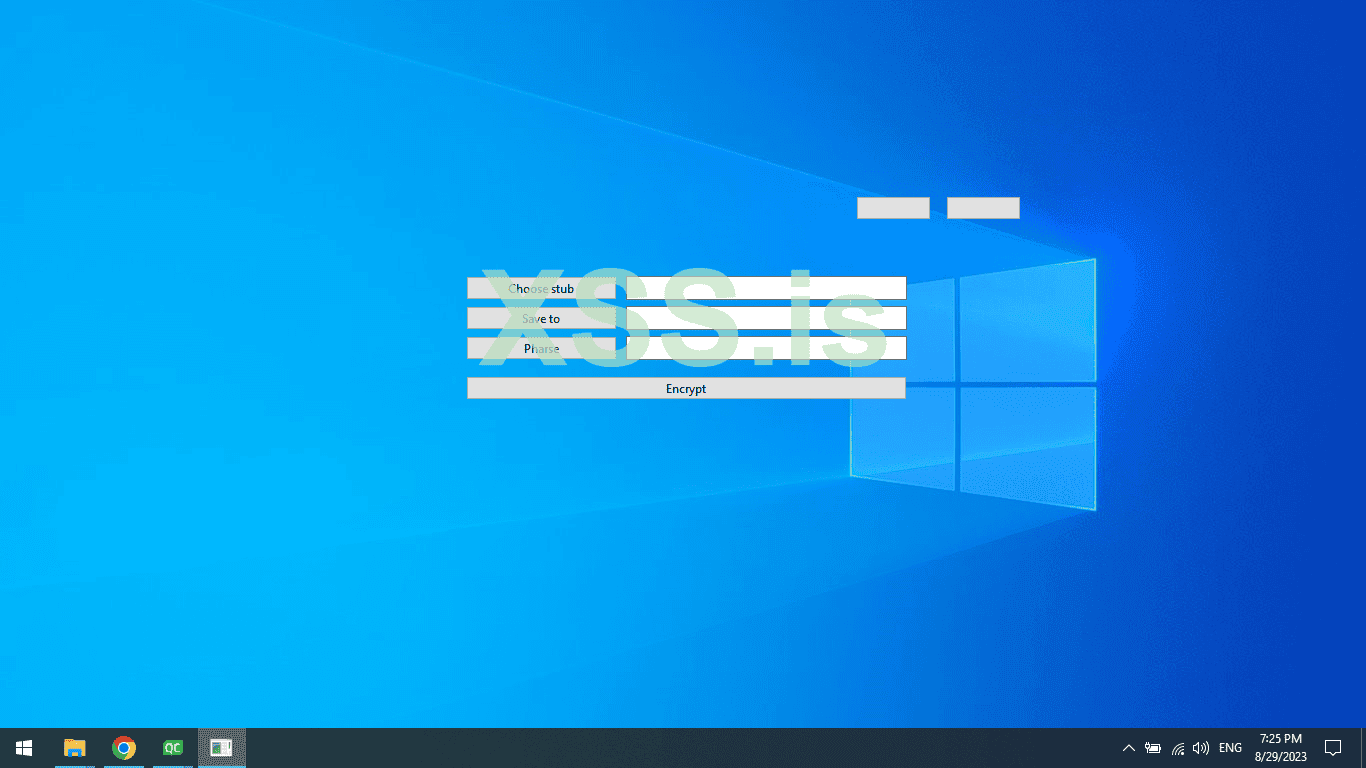
The transparency will give us the ability to make the border-radius.
Now get back to the Designer and Right click on Mainwindow in the right corner
And choose Change stylesheet, it will pop up a small window in this window we can add style to the window and components on the window such as buttons, qlabels, qwidgets, etc …
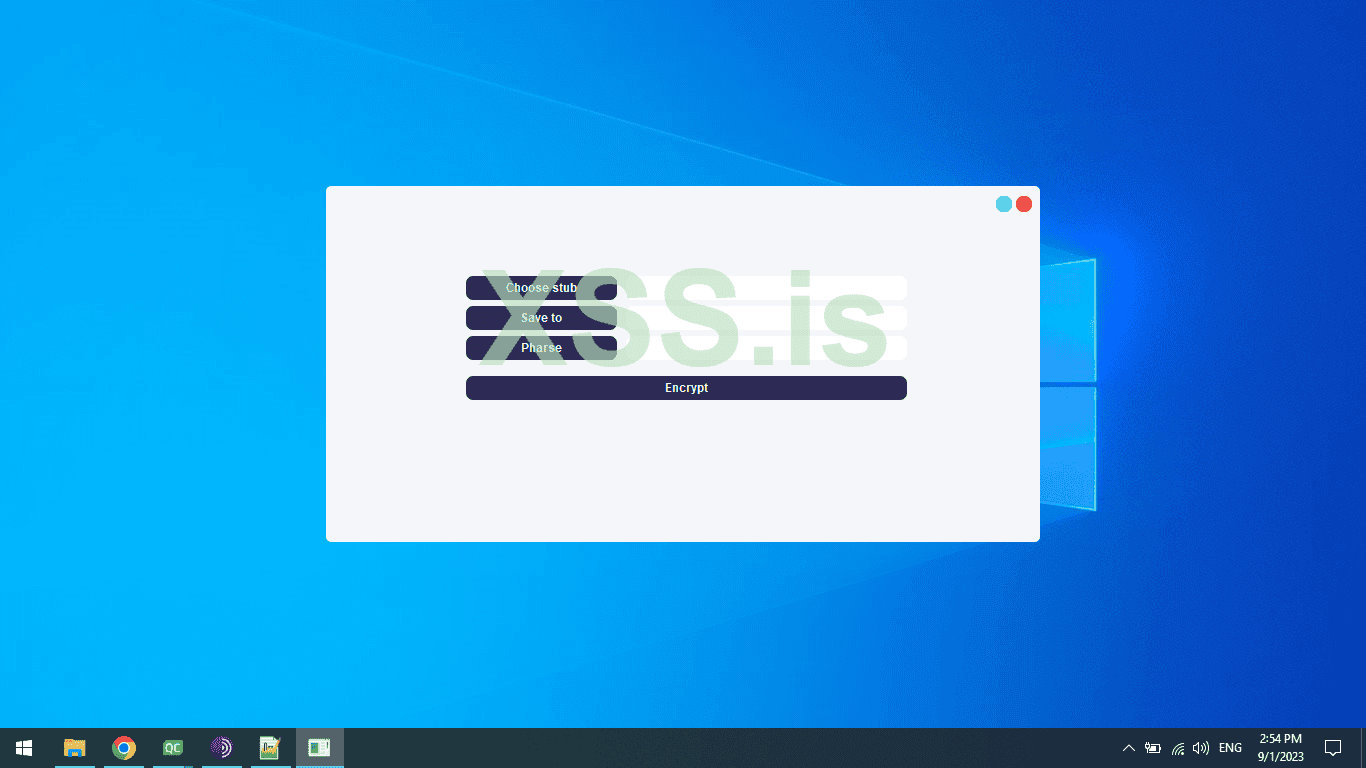
Now add the following code to this will add background color, change the default font, add a border-radius, and change font weight Also will style the QPushButton, QlineEdit
CSS: Скопировать в буфер обмена
The result is shown in the picture below.
Now Will make the MainWindow also Dynamic as we did before in LoginForm.
Will first start with the title bar go to Designer and right click on the close_button then choose Go to Slot and choose Clicked then click on OK. Again go to Designer and this time Right click on the minimise_button choose Go to Slot and choose Clicked then click on OK.
Automatically will take you to Mainwindow.cpp on on_close_button_clicked()
Add the following code
C++: Скопировать в буфер обмена
And on the on_minimise_button_clicked() Add the following code
C++: Скопировать в буфер обмена
The code below is very simple when we click on close_button we simply close the Window
And on the minimise_button we used showMinimized to minimize the window without closing it
We could also add a maximize button to make the window fullscreen but I see there is no reason to do that, but you can use this function showMaximized if you want it.
Let's add a QMouse event to control the mouse and add the ability to move the MainWindow
To do that Just repeat the past steps that we did before for the LoginWindow
To make it easier for you, go to Mainwindow.h and in private add the following code.
C++: Скопировать в буфер обмена
Then go to MainWindow.cpp and add this code
C++: Скопировать в буфер обмена
I will not explain it again, but you can read the tutorial again if you miss the explanation on the Top
Rebuild the project and now you should be able to move the window as you want
Okay, click on these three buttons one by one and add a click slot, like we do in the last step
Choose_stub,save_stub_button,encrypt_button.
Now every button has on Clicked slot except the pharse_button We use this button as a label and not need to be clickable
Go to MainWindow.cpp on top under Library include add these variables.
C++: Скопировать в буфер обмена
scroll until you find the function Choose_stub This function will use it to get the path of the stub that we want to encrypt and will save the path in the Global variable that we added in the code above.
Add this code inside the choose_stub button function name should be something like this: on_choose_stub_clicked
C++: Скопировать в буфер обмена
Now in the save button as I said before this button to select the path where we want to save the final encrypted file.
Add this code inside the function
C++: Скопировать в буфер обмена
The codes 2 above are very simple.
First, we QFileDialog and getOpenFileName to get the filename and path that we want to encrypt
Second, we used QFileDialog and getSaveFileName to get the path and name of the file we want to save (Encrypted file)
The last Button is very important go to the function and add this code
C++: Скопировать в буфер обмена
If you are familiar with c++ or any other programming language you should understand it easily we are only checking if the inputs are not empty meaning,
If a user tries to click Encrypt without entering any of the required data like phrase or stub path or save path, will show a warning message without doing anything else
Wohoo We finished all the Gui and styling the GUI
But I will not finish PART 1 here I wanna give you some agitational without going Advanced,
So let us finish up the Authentication System.
To do that install Wamp server or any other webserver
Create a folder named it crypter create a file named it auth.php, Open it up with your favorite editor, and add this code.
PHP: Скопировать в буфер обмена
Done, We Have finished the php code for the authentication,
Now create a new database, then create 1 table with 3 columns.
1 - id
2 - serial_key
3 - hwid
Make the ID auto increment. then press Save.
Now add a random serial I used this ba27-1c3a-4b91-a4b7-87fa , added random hwid I used this random HWID 03000102030405060708090a0b0c0d0e0f .
The HWID will use it to lock the serial for 1 PC so if the user shares the serial with another user to avoid paying the developer so he can’t be logged in.
Now replace the dbname,dbuser,dbpass, and dbhost.
As you can see we used the Get method which means we can use the browser to check if it works or not. to do that open your browser and add your localip/filepath/auth.php?serial_key=the_serial_key_you_add_in_db
If the code is working should print Registered if the serial is true and UnRegistered if the serial is false.
Close the php Editor and go back again to qt editor go to loginform.h
And add the following code
C++: Скопировать в буфер обмена
Then go to Loginform.cpp and remove this code
C++: Скопировать в буфер обмена
and add this code.
C++: Скопировать в буфер обмена
Explaining the code:
What we did in loginform.h we create a custom slot to check when the request is finished without crashing the GUI.
In Loginform.cpp we removed the Static serial key and will create a dynamic one so we add the URL of our auth.php read the Serial entered by the user and store it in the QString variable under the name Serial_Key, then append it to AUTH_URL to have the full Url finally, we create an instance from the class QNetworkAccessManager and create an http get request and from the previous slot onfinish we Read the body and making if statement to check the body if the body is Registered that means the SerialKey is true other than its false
I recorded for you a video showing what we finished
So for today and for this part that’s all.
I Will add new part ASAP
The Killer Guide by TOP G
Source https://xss.is
The final result of the crypter we will develop in this tutorial :
Hi, today I will teach you how to develop your own advanced crypter Fud Runtime + Scantime, After this tutorial I guarantee to you , you will bypass Most used AV ( antiviruses ) Such as Windows Defender, Kaspersky, Avira, Avast, Bitdefender, AVG, and more.
I will leave ( Proof of concept ) Videos for you to see the bypass, I created videos Bypassing on the Top asked to bypass Av like Windows Defender and Kaspersky.
This is an advanced tutorial that will help beginners and advanced Users, So stay with me and make sure your coffee cup is ready before you start reading.
This Guide will be splited into Three stages,
Stage 1: The GUI which will be the builder including the Login window which will handle the serial key between the server and GUI and if login success will close itself and Show the MainWindow, and the MainWindowwhich will be used to handle the shellcode
between the server and the Gui.
Attention: We will use the Server side for Authentication, Let us assume we have 100 Paid users, every user should have a different SerialKey, which will store the SerialKey in the database on the Server side, Also We will use the Server side to encrypt the Cobalt strike beacon for a reason.
Why use Server-side for Encryption?
We wan’t store the encrypted shellcode for example: in the pe section or Resource cause these two ways are most of the time detected
One more reason is To make our Final stub More FUD and undetectable By building it at Runtime I will discuss everything later.
Stage 2: HTTP Server with php installed On Windows System, I suggest you use Windows Server 2019 with Microsoft Defender Disabled.
The Web server using php will handle the logging data that came from the Gui and return the Status.
Also as I said before will handle the uploaded UnEncrypted cobalt strike beacon then encrypt it using MSBuild ( MSBuild will build our c++ project ) and return the Download Link to the Gui Which will download the Encrypted stub to the Path selected by the User
Stage 3: The last stage is the Encrypted stub which will store the encrypted beacon on it as an unsigned char than in the main() function.
We will use some techniques to hide the IAT import address table Also this section will be discussed in its stage.
Here is what iam using tools and languages to develop the Crypter
I will use CobaltStrike version 4.8 as a C2 you can use any other framework like Metasploit
#What Skills do you need to continue reading and learning from this tutorial?
1 - Just c/c++ Language (Visual studio c++)
2 - Gui (Qt C++) If you don’t have any idea or skills to use Qt don’t worry I explained everything in the tutorial
3 - php but if you are familiar with Python or NodeJs you could also use them if you want
Download Wampserver and install it on your Windows server
Let's start with the GUI
Please first Download Qt6 c++ version 6.5.2 that’s the version iam using Right now.
If you already have Qt installed then launch it up and create a new project and make sure the selected compiler is x64
This is the main window it should look like this.
The project came with a default Mainwindow.ui, We need to add a new Qt class from design to generate a new window for login.
Scenario: I guess you already know that Paid software always comes with a serial key Window before you can use the software, so when you enter the license Key then you can use the software. It's like a protection to Force people to pay for the developer before they can use their software.
The Project by Default If we build it and run it will show up in the Mainwindow by default, but we want to work on the Loginform window so to show the LoginForm window go to main.cpp and comment w.show() and add the following code
C++: Скопировать в буфер обмена
Код:
LoginForm loginform;
loginform.show();
The code above will create an object from the Loginform class and then use the function show() to show the Window of the Loginform.
Now on The left Under Welcome Click Edit then right-click on The Main project, and now click on Add New, After that, it will show a new window to choose a type of file to add to the project, Double Click on Qt Designer From Class then Double Click on MainWindow But warning as you remember the project came with default window name Mainwindow so make sure to change the new one , I prefer to name it as his job the Job of the new Window to make sure the user has a Serial Key and He Paid to use the Software.
So I named it LoginForm.
Now delete, Menubar and Statusbar and should look like this, The reason we want to delete the menubar and status bar because we want to make our custom title bar
Now in LoginForm Go to property and search for geometry and click on Change the Width and height to the Following Sizes.
Width: 400
Height: 266
Now in the left corner search for Qwdigets and drop 4 widgets.
The first Widget is for the Mainwindow and the second Widget is for the LoginBox which will hold input and QEditLabel and QPushButton, The third Widget will be for the Custom title bar and the Fourth and last one is for the Footer which will hold the name of the Developer.
Change the sizes And X, Y of the MainWidget and make the sizes as the MainWindow of LoginForm.
Width: 400
Height: 266
X: 0
Y: 0
This is what it looks like
Now the Second LoginBox qWidget Change the sizes and X, and Y to the following data.
Width: 351
Height: 121
X: 25
Y: 60
Title Bar qWidget geometry data.
Width: 400
Height: 21
X: 0
Y: 0
Footer qWidget geometry data.
Width: 400
Height: 31
X: 0
Y: 232
Now search for QPushButtons and drop 1 QPushButton to TitleBar and 2 QPushButton to LoginBox, also Search for QLineEdit and drop one to LoginBox qWidget.
Change the text of QPushButtons on LoginBox and make one License Key and the other one Login
Also, change their names from Property in the right corner
Name the Login button as login_button and name the License Key button as
LicenseKeyLabel and name the QLineEdit as LicenseKey
Now time to change the sizes and geometry.
login_button
Width: 261
Height: 24
X: 40
Y: 70
LicenseKeyLabel :
Width: 101
Height: 24
X: 40
Y: 30
LicenseKey
Width: 151
Height: 24
X: 150
Y: 30
Result :
Now Click on QPushButton on the title bar and remove the text and name it as close_button
Let us now change the style of the Login Form, first of all, go to loginform.cpp
In QMainWindow add the following code
C++: Скопировать в буфер обмена
Код:
  this->setWindowFlags(Qt::WindowType::FramelessWindowHint);
    setAttribute(Qt::WA_TranslucentBackground, true);
The code we wrote above will change the background to transparent and make the no frame or frameless for the window.
So when we add color and border radius to the main qWidget it applied and enabled other than we can’t see the border-radius also the default title bar will be visible.
Now go back to designer and right click on QMainWindow or LoginForm and Choose Change StyleSheet.
Add the following code in the Pop upped box Make Sure you named the Main qWidget to MainWidget.
CSS: Скопировать в буфер обмена
Код:
*
{
    font-family:Arial;
    font-weight: Bold;
}
#MainWidget
{
    background-color:#f5f6fa;
    border-radius:5px;
}The result is in the image below.
Go back again to the stylesheet and again add this new code.
CSS: Скопировать в буфер обмена
Код:
#close_button
{
    background-color:#ff5252;
    border:0px;
    color:#fff;
    border-radius:7px;
}

#close_button:hover
{
    background-color:#b33939 ;
}
The code simply changes the radius for the close_button and adds color and on Hover changes the color.
Now Click on the close_button then in the right corner search for geometry and change the geometry data and sizes for close_button
close_button
Width: 16
Height: 16
X: 380
Y: 4
Result :
Attention: You can use your own colors.
Now it's the time to play with input colors, Get Back again to the stylesheet again add this new code
This will be the final stylesheet css code .
CSS: Скопировать в буфер обмена
Код:
#login_button,#LicenseKeyLabel
{
    background-color:#2c2c54;
    color:#f5f6fa;
    border:0px;
    border-radius:7px;
}

#LicenseKey
{
    border:0px;
    border-radius:7px;
    color:#2c2c54;
}
Build and run the project, and the result is seen in the picture below.
Close the Crypter and get back to Designer now Righ click on the close_button Then click on Go to slots and choose Clicked slot then Press the OK button, It should take you to LoginForm.cpp
Inside void on_close_button_clicked write the following Code.
C++: Скопировать в буфер обмена
this->close();Rebuild the project and Launch it again now when the Project opens click on the close button it should close the login window.
Now the Title bar is finally finished, but we have a problem We can’t move the Window because we deleted the default title bar so To fix this problem we need to add 2 mouse events first one is
mousePressEvent and the second one is mouseMoveEvent
To do that go to loginform.h scroll down to Private: , then add the following code
C++: Скопировать в буфер обмена
Код:
[/FONT]
    void mousePressEvent(QMouseEvent *event);
    void mouseMoveEvent(QMouseEvent *event);
    QPoint current_position;
    QPoint new_position;
[FONT=arial]
When you finish go to loginform.cpp and add the following code
C++: Скопировать в буфер обмена
Код:
void LoginForm::mousePressEvent(QMouseEvent *event)
{
    current_position =event->globalPosition().toPoint();
}

void LoginForm::mouseMoveEvent(QMouseEvent *event)
{
    new_position = QPoint(event->globalPosition().toPoint() - current_position);
    move(x() + new_position.x() , y() + new_position.y() );
    current_position = event->globalPosition().toPoint();
}
Now rebuild the Project and click on the loginform window and move, as You can see how you can move it on screen as you want
Let's explain the code.
mousePressEvent: This function is very simple it only gets the current position and converts it to Point
mouseMoveEvent: It gets the new position then minus it from the old current position and then uses the value to move the window
Now here is a complex step so to understand it very well please pay attention.
So as you know we have 2 windows 1 is the Login window and the second window is the crypter MainWindow.
To Show the MainWindow from Loginform we need to create a signal inside Loginform.h and also create an on_click slot on Login Finally we connect the signal and mainwindow using Connect from Main.cpp
To create the on-click event go to Designer and Right click on the login_button then click on go to slot From QAbstractButton choose clicked() then Ok
To create the Signals in the LoginForm Class add the Signal the codes for Signal are Down below.
C++: Скопировать в буфер обмена
Код:
signals:
    void LoginSignal(bool status);
This code for the Login Button
C++: Скопировать в буфер обмена
Код:
    if(ui->LicenseKey->text() == "1")
    {
        QMessageBox::information(this,"Success ","Login Success");
        emit LoginSignal(true);
        this->close();
    }
    else
    {
        emit LoginSignal(false);
        QMessageBox::critical(this,"Error ","Wrong Licesne Key");
    }
For now, we only make the SerialKey static but Don’t worry we will make it Dynamic Soon when we come to the Server Authentication Part so we will get back to here soon.
go to Main.cpp and the connect code
C++: Скопировать в буфер обмена
Код:
    LoginForm loginform;
    loginform.show();

    QObject::connect(&loginform, &LoginForm::LoginSignal, [&w](bool statusStatus)
    {
        if(statusStatus == true)
        {
            qDebug() << "Status : " << statusStatus << " \n";
            w.show();
        }
    });
Now Compile the Project and try to add an Incorrect Serial Key and should see this error message
Now try to relaunch the program but this time add the real serial key they will show a success message Then when you click ok it will exit the login Window and show the Main Crypter Window.
Ok woohoo, we almost finishing the Gui .!
Now it's time to start with the MainWindow, so Click on Edit Again Then Click on mainwindow.ui
Now delete the Menubar and Statusbar as we did before …. Don’t get confused this is the MainWindow, not the LoginWindow so everything we do in the login window is still saved so don’t worry about the Empty Window.
and should look like this
Resize the mainwindow make the width: 714 and the height: 356, then
Search for qWidget and add 4 of them, First qWidget will act as MainWindow and it will hold everything and you will see that soon, One for the Custom title bar, and One for the Inputs and buttons, and the last one for the footer.
The mainWindow should be like this.
Now on the center qWidget click on it with your mouse and go to geometry in the right corner as you see in the picture above and add the width and height and the x, and y like the following.
Width: 714
Hight: 356
X : 0
Y : 0
Now on the Top left qWidget click on it with your mouse and do the same as the last step
Width: 714
Hight: 40
X : 0
Y : 0
And now it should look like this.
Finally, name it titlebar.
Now Click on the Bottom left of one qWidget and go to geometry again and put the following data :
Width: 714
Hight: 31
X : 0
Y: 320
Name it as a footer, should be like the image below.
Now the last Qwidget, this qWdiget will hold the inputs, labels, and buttons
Click on it and also do the same as before by filling in the geometry and name object with the below data.
objectName: Main
Width: 481
Hight: 201
X: 120
Y: 70
The result for the last steps
Now drop two QPushButtons to the title bar and Four QPushButtons for the Main qWidget then drop three QLineEdit also to Main qWdiget
On the title bar name the first QPushButton as close_button and the second name it as minimise_button and remove the default text.
The main window should be like this.
Now go to main qWdiget and edit the three buttons and three qLineEdit, change their names and geometry data as follows
1 - Choose stub: This is a button to choose the file you want to crypt
Name: choose_stub
Geometry data :
Width: 151
Hight: 24
X: 20
Y: 20
2 - Save encrypted stub: This is a button to where to save the final encrypted stub ( The crypt ).
Name: save_encrypted_stub
Geometry data :
Width: 151
Hight: 24
X: 20
Y: 50
3 - Pharse: This is a button to acts as a Label that tells you where to write the phrase or password
Name: pharse_button
Geometry data :
Width: 151
Hight: 24
X: 20
Y: 80
4 - Encrypt stub: This is a button When you Click it will run the crypting Code
Name: encrypt_button
Geometry data :
Width: 441
Hight: 24
X: 20
Y: 120
Now the QLineEdit.
1 - Selected File Path: Here will show the path of the stub you want to encrypt
Name: selected_file_path
Geometry data :
Width: 281
Hight: 24
X: 180
Y: 20
2 - Saved file path: Here will show the path of the encrypted stub
Name: saved_file_path
Geometry data :
Width: 281
Hight: 24
X: 180
Y: 50
2 - Pharse: Here will Enter the Pharse ( password )
Name: phrase
Geometry data :
Width: 281
Hight: 24
X: 180
Y: 80
The result should now be like this
Now, we will Remove the Default title bar by adding a frameless and transparent background to the mainwindow
To do that go to mainwindow.cpp
And add the following code to the MainWindow
C++: Скопировать в буфер обмена
Код:
    this->setWindowFlags(Qt::WindowType::FramelessWindowHint);
    setAttribute(Qt::WA_TranslucentBackground, true);
Compile the code Note: You can use the shortcut Ctrl + R to build and launch the exe
The transparency will give us the ability to make the border-radius.
Now get back to the Designer and Right click on Mainwindow in the right corner
And choose Change stylesheet, it will pop up a small window in this window we can add style to the window and components on the window such as buttons, qlabels, qwidgets, etc …
Now add the following code to this will add background color, change the default font, add a border-radius, and change font weight Also will style the QPushButton, QlineEdit
CSS: Скопировать в буфер обмена
Код:
*

{

    font-family:Arial;

    font-weight: Bold;

}

#Main

{

    background-color:#f5f6fa;

    border-radius:5px;

}


/**/


#close_button

{

    background-color:#ff5252;

    border:0px;

    color:#fff;

    border-radius:7px;

}


#close_button:hover

{

    background-color:#b33939 ;

}


#minimise_button

{

    background-color:#33d9b2;

    border:0px;

    color:#fff;

    border-radius:7px;

}


#minimise_button:hover

{

    background-color:#218c74;

}


#choose_stub ,  #encrypt_button, #pharse_button , #save_stub_button

{

    background-color:#2c2c54;

    color:#f5f6fa;

    border:0px;

    border-radius:7px;

}


#selected_file_path , #saved_file_path, #pharse

{

    border:0px;

    border-radius:7px;

    color:#2c2c54;

}


#dev

{

    color:#ff5252;

    font-size:15px;

}

#footer_lb_1

{

    color:#ffb142;

    font-size:15px;

}
The result is shown in the picture below.
Now Will make the MainWindow also Dynamic as we did before in LoginForm.
Will first start with the title bar go to Designer and right click on the close_button then choose Go to Slot and choose Clicked then click on OK. Again go to Designer and this time Right click on the minimise_button choose Go to Slot and choose Clicked then click on OK.
Automatically will take you to Mainwindow.cpp on on_close_button_clicked()
Add the following code
C++: Скопировать в буфер обмена
this->close();And on the on_minimise_button_clicked() Add the following code
C++: Скопировать в буфер обмена
this->showMinimized();The code below is very simple when we click on close_button we simply close the Window
And on the minimise_button we used showMinimized to minimize the window without closing it
We could also add a maximize button to make the window fullscreen but I see there is no reason to do that, but you can use this function showMaximized if you want it.
Let's add a QMouse event to control the mouse and add the ability to move the MainWindow
To do that Just repeat the past steps that we did before for the LoginWindow
To make it easier for you, go to Mainwindow.h and in private add the following code.
C++: Скопировать в буфер обмена
Код:
[/FONT]

    void mousePressEvent(QMouseEvent *event);
    void mouseMoveEvent(QMouseEvent *event);
    QPoint current_position;
    QPoint new_position;
[FONT=arial]
Then go to MainWindow.cpp and add this code
C++: Скопировать в буфер обмена
Код:
[/FONT]
void MainWindow::mousePressEvent(QMouseEvent *event)
{
    current_position =event->globalPosition().toPoint();
}

void MainWindow::mouseMoveEvent(QMouseEvent *event)
{
    new_position = QPoint(event->globalPosition().toPoint() - current_position);
    move(x() + new_position.x() , y() + new_position.y() );
    current_position = event->globalPosition().toPoint();
}

[FONT=arial]
I will not explain it again, but you can read the tutorial again if you miss the explanation on the Top
Rebuild the project and now you should be able to move the window as you want
Okay, click on these three buttons one by one and add a click slot, like we do in the last step
Choose_stub,save_stub_button,encrypt_button.
Now every button has on Clicked slot except the pharse_button We use this button as a label and not need to be clickable
Go to MainWindow.cpp on top under Library include add these variables.
C++: Скопировать в буфер обмена
Код:
QString stub_path;
QString encrypted_stub_path;
QString Pharse;
int GlobalStatus = 0;
scroll until you find the function Choose_stub This function will use it to get the path of the stub that we want to encrypt and will save the path in the Global variable that we added in the code above.
Add this code inside the choose_stub button function name should be something like this: on_choose_stub_clicked
C++: Скопировать в буфер обмена
Код:
  stub_path = QFileDialog::getOpenFileName(this,"Select stub",QDir::homePath());
    ui->selected_file_path->setText(stub_path);
Now in the save button as I said before this button to select the path where we want to save the final encrypted file.
Add this code inside the function
C++: Скопировать в буфер обмена
Код:
    encrypted_stub_path = QFileDialog::getSaveFileName(this,"save encrypted stub to ...",QDir::homePath(),"Exe files (*.exe);;");
    ui->saved_file_path->setText(encrypted_stub_path);
The codes 2 above are very simple.
First, we QFileDialog and getOpenFileName to get the filename and path that we want to encrypt
Second, we used QFileDialog and getSaveFileName to get the path and name of the file we want to save (Encrypted file)
The last Button is very important go to the function and add this code
C++: Скопировать в буфер обмена
Код:
    if(!stub_path.isEmpty() || !encrypted_stub_path.isEmpty() ||  !ui->pharse->text().isEmpty())
    {

    }
    else
    {
        QMessageBox::critical(this,"Error"," Please make sure all inputs are not Empty");
    }
If a user tries to click Encrypt without entering any of the required data like phrase or stub path or save path, will show a warning message without doing anything else
Wohoo We finished all the Gui and styling the GUI
But I will not finish PART 1 here I wanna give you some agitational without going Advanced,
So let us finish up the Authentication System.
To do that install Wamp server or any other webserver
Create a folder named it crypter create a file named it auth.php, Open it up with your favorite editor, and add this code.
PHP: Скопировать в буфер обмена
Код:
<?php

    error_reporting(0);

    $host = "127.0.0.1";
    $user = "root";
    $pass = "";
    $db   = "crypter";

    $connect = mysqli_connect($host, $user, $pass,$db);

    if (!$connect)
    {
        die("Connection failed: " . mysqli_connect_error());
    }
    else
    {
        $serial_key = strip_tags($_GET["serial_key"]);


        $search_in_db = "SELECT serial_key FROM paidmember WHERE  `serial_key`='$serial_key' ";//ba27-1c3a-4b91-a4b7-87fa
        $result       = mysqli_query($connect,$search_in_db);

        if(mysqli_num_rows($result) >= 1)
        {
            //echo "$serial_key <br/>";
            echo "Registered";
        }
        else
        {
            echo "NotRegistered";
        }

    }


?>
Done, We Have finished the php code for the authentication,
Now create a new database, then create 1 table with 3 columns.
1 - id
2 - serial_key
3 - hwid
Make the ID auto increment. then press Save.
Now add a random serial I used this ba27-1c3a-4b91-a4b7-87fa , added random hwid I used this random HWID 03000102030405060708090a0b0c0d0e0f .
The HWID will use it to lock the serial for 1 PC so if the user shares the serial with another user to avoid paying the developer so he can’t be logged in.
Now replace the dbname,dbuser,dbpass, and dbhost.
As you can see we used the Get method which means we can use the browser to check if it works or not. to do that open your browser and add your localip/filepath/auth.php?serial_key=the_serial_key_you_add_in_db
If the code is working should print Registered if the serial is true and UnRegistered if the serial is false.
Close the php Editor and go back again to qt editor go to loginform.h
And add the following code
C++: Скопировать в буфер обмена
void onfinish(QNetworkReply *rep);Then go to Loginform.cpp and remove this code
C++: Скопировать в буфер обмена
Код:
    if(ui->LicenseKey->text() == "1")
    {
        QMessageBox::information(this,"Success ","Login Success");
        emit LoginSignal(true);
        this->close();
    }
    else
    {
        emit LoginSignal(false);
        QMessageBox::critical(this,"Error ","Wrong Licesne Key");
    }
and add this code.
C++: Скопировать в буфер обмена
Код:
void LoginForm::onfinish(QNetworkReply *rep)
{
[/FONT]
    QByteArray ReadedBytes = rep->readAll();
    QString string_Body(ReadedBytes);
    qDebug() << "Replay : \n" << string_Body;

    if(string_Body == "Registered")
    {
        QMessageBox::information(this,"Success ","Login Success");
        emit LoginSignal(true);
        this->close();
    }
    else if (string_Body == "NotRegistered")
    {
        emit LoginSignal(false);
        QMessageBox::critical(this,"Error ","Wrong Licesne Key");
    }
[FONT=arial]
}
void LoginForm::on_login_button_clicked()
{[/FONT]
    qDebug() << "Login button Clicked \n";
    QString AUTH_URL  = "http://192.168.0.100/crypter/auth.php?serial_key=";
    QString Serial_Key = ui->LicenseKey->text();
    AUTH_URL.append(Serial_Key);
    qDebug() << AUTH_URL;
    QUrl url(AUTH_URL);
    QNetworkAccessManager *ntmanager = new QNetworkAccessManager(this);
    connect(ntmanager,&QNetworkAccessManager::finished,this,&LoginForm::onfinish);
    ntmanager->get(QNetworkRequest(url));
[FONT=arial]}
Explaining the code:
What we did in loginform.h we create a custom slot to check when the request is finished without crashing the GUI.
In Loginform.cpp we removed the Static serial key and will create a dynamic one so we add the URL of our auth.php read the Serial entered by the user and store it in the QString variable under the name Serial_Key, then append it to AUTH_URL to have the full Url finally, we create an instance from the class QNetworkAccessManager and create an http get request and from the previous slot onfinish we Read the body and making if statement to check the body if the body is Registered that means the SerialKey is true other than its false
I recorded for you a video showing what we finished
So for today and for this part that’s all.
I Will add new part ASAP